Note: I wrote this when I was like 16 or so.
How To Trick Intels GVT-G Into Working
Hi! Intel whipped up a really cool solution to the common problem of "I have a linux laptop and I need to run accelerated windows but I didn't buy the 30LB laptop with two gpus and liquid cooling." Because of their gpu architecture or whatever they managed to make it so you can split your iGPU into two or more gpus. Very nice :D.
However, its not easy to do at all... the documentation is not up to date, and it sometimes breaks in strange ways without reason. Thats why, in this post, I'll show you how to set up an accelerated Windows VM with all the cool speedy virtio drivers and iGVT-G.
You will need a somewhat recent cpu.
Breaking Your Kernel (Step 1)
Make sure your kernel is up to date. It looks like they checked the GVT-G stuff in before release 4.8, but it definitely didn't work as well back then, so I'd use the latest available. If you are weird enough to build your own kernel, enable these options. As well, turn off trimming unused ksyms, which will cause this bug.
Now you need to change your kernel commandline. The important parts are i915.enable_gvt=1 kvm.ignore_msrs=1 intel_iommu=on i915.enable_guc=0. Make sure you dont override enable_guc=0 with something that enables GuC loading, as it will make i915 crash frusteratingly. Once you boot, login to your desktop, and take a look at /sys/bus/pci/devices/0000:00:02.0/mdev_supported_types/. If this doesnt exist, GVT-G isn't working. Check your logs and/or sob into your hands.
Some ways to fix the problem include adding these modules to the initramfs, and removing i915 from it.
For more logging, you can set drm.debug to something, setting it to 0x02 will enable driver messages.
Making A Virtual Friend (Step 2)
Inside mdev_supported_types is a lovely bunch of folders. Depending on how much AGP memory/some weird graphics memory thing you have, it'll list some vgpus you can create. The description file inside each of the folders tells you the memory and resolution they have. If, like me, creating a largish one by echoing a UUID to the /create file gives you an arcane error message, you have a few choices to make. The first thing you should do is add more GPU memory in your bios, if it lets you. If that doesn't work, you can stop your display manager and switch to a framebuffer and create the VGPU there, and get a correct resolution vgpu, and then start x11 again. Unfortunately this causes many bugs and cannot reach 60fps on my laptop. The alternative is to create a tiny VGPU and use a program (CRU) to force resolution higher. This reaches 60fps on my laptop and causes much less bugs and system hangs.
Create VGPU:
echo fff6f017-3417-4ad3-b05e-17ae3e1a4615 | sudo tee /sys/bus/pci/devices/0000:00:02.0/mdev_supported_types/i915-GVTg_V5_8/create
Remove VGPU (if you want):
echo 1 | sudo tee /sys/bus/mdev/devices/fff6f017-3417-4ad3-b05e-17ae3e1a4615/remove
Cortana Yells At You (Step 3)
Time to do the significantly more well supported and significantly more slow and painful installation of Windows 10. Please don't use a shady torrent or unofficial download, or an older version of Windows. The correct link is here. As well, you should grab a copy of the virtio drivers on disk designed to speed up guests here. Install libvirt(-daemon) and virt-manager and run systemd start libvirtd.
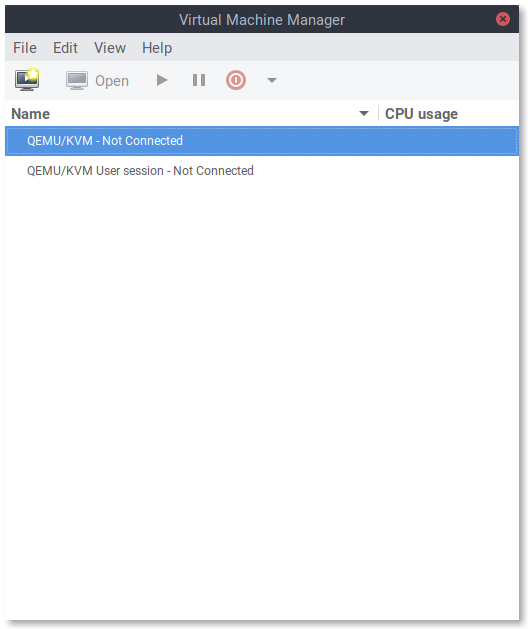
Startup that manager thing and make sure to connect to your system libvirt, not your user session (see picture).
 Once you do that, its time to create your virtual machine. Follow the setup dialog, and select local iso image. Press browse and browse local to locate the image. If it doesnt detect the iso as Windows 10, you need to manually enter that in, as it speeds up Windows by providing some of Microsofts virtualization interfaces. Create a disk image or LVM partition, and customize your installation. The customize your installation screen is really limited, so I tend to start the installation and then immediately kill it so I can fully customize. Heres some relevant settings.
 You will also need to use BIOS, not UEFI. This is the default as of right now so dont worry if you didn't touch it.
If you want speedy disk access and even the possibility of your virtual machine image shrinking when you delete files on the virtual machine (TRIM passthrough, you need to make the image with
You will also need to use BIOS, not UEFI. This is the default as of right now so dont worry if you didn't touch it.
If you want speedy disk access and even the possibility of your virtual machine image shrinking when you delete files on the virtual machine (TRIM passthrough, you need to make the image with qemu-img create -f qcow2 -o preallocation=metadata,lazy_refcounts, full guide here), set your main disk to use an SCSI bus. The virtual machine needs a driver to understand this format, so attach a second dvd (alongside the windows 10 installation one) with the virtio drivers we downloaded earlier. By default these use an IDE bus, so you might get faster installation times (and less legacy code involved) by using a SATA bus for the dvd disks instead. This is supported by default in windows. Some other things you can do are:
- Change USB bus to USB 3
- Add the channels spice, spice-webdav, and qemu-ga for copy paste through the VM in SPICE mode
- Delete busses that arent being used
- Switch the emulated graphics card to QXL and switch the display to spice thats NOT listening on network (even loopback)
- Switch to the q35 machine type, the setting is near the bios settings.
- Pet your dog
You can also get used to your new friend virsh edit. If you run it with sudo -E, the EDITOR environment variable gets passed through and you use the system libvirt and not the user one. Some things I like to do in this file are pin the virtual cpus to real cpus, so my caches are more consistent and scheduling is less weird. Here are some XML fragments you can dump in there.
<vcpu placement='static'>6</vcpu>
<cputune>
  <vcpupin vcpu='0' cpuset='1'/>
  <vcpupin vcpu='1' cpuset='2'/>
  <vcpupin vcpu='2' cpuset='3'/>
  <vcpupin vcpu='3' cpuset='5'/>
  <vcpupin vcpu='4' cpuset='6'/>
  <vcpupin vcpu='5' cpuset='7'/>
</cputune>
<features>
  <hyperv>
    <relaxed state='on'/>
    <vapic state='on'/>
    <spinlocks state='on' retries='8191'/>
    <runtime state='on'/>
    <synic state='on'/>
    <stimer state='on'/>
  </hyperv>
</features>
<cpu mode='host-passthrough' check='none'>
  <topology sockets='1' cores='3' threads='2'/>
</cpu>
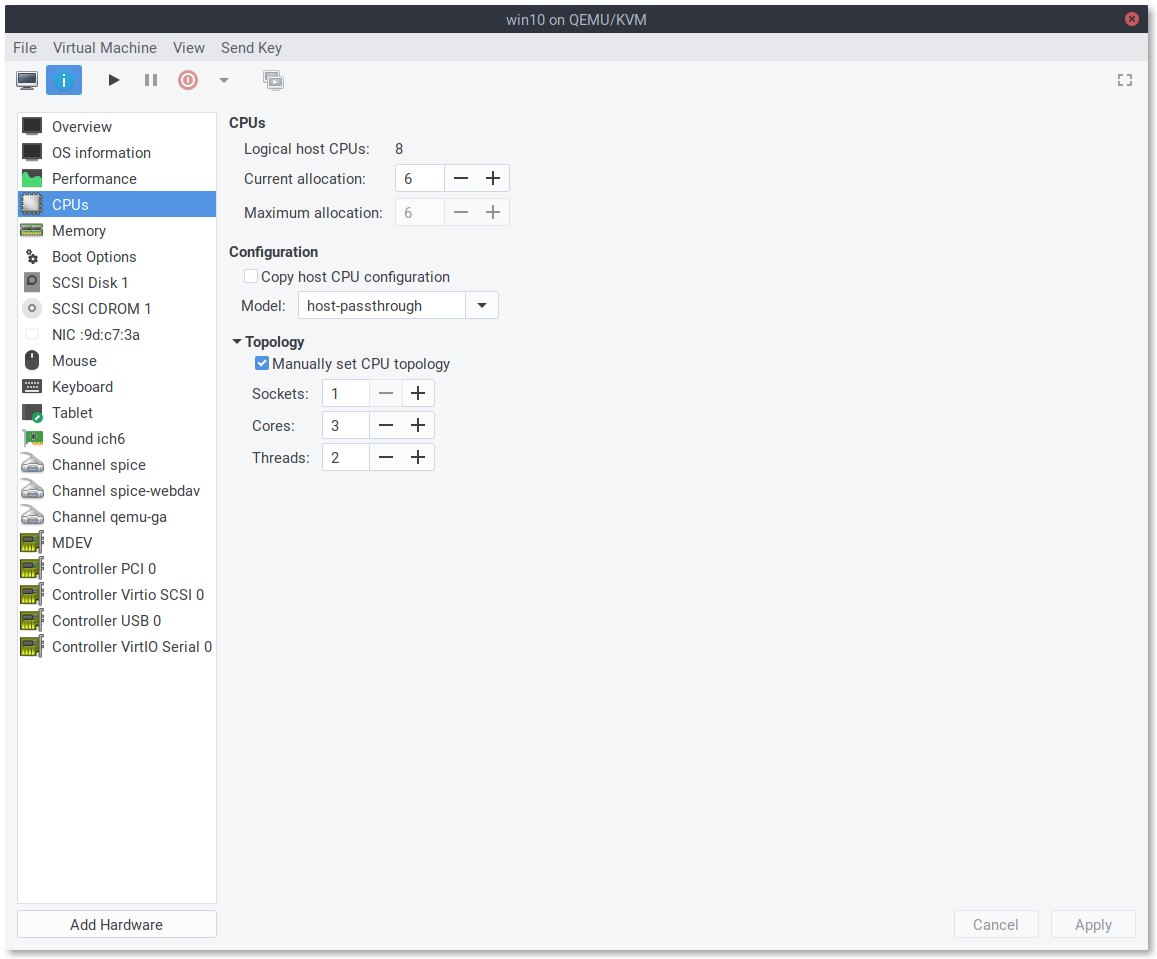
What I do here is set it up so that the VM sees a cpu with 3 physical cpus, and each has two hyperthreads. I then pin each hyperthread/cpu to a real hyperthread, so its never moved around. Windows scheduler is aware of hyperthreads, so it can use them correctly instead of thinking they are full cpus. I also enable some hyperv interfaces that arent enabled by default and might not do anything. If you are using spice, you can add in the following to disable any compression because you arent using an external network to access the vm.
<graphics type='spice'>
   <listen type='none'/>
   <image compression='off'/>
   <jpeg compression='never'/>
   <zlib compression='never'/>
   <playback compression='off'/>
   <streaming mode='off'/>
   <!-- <gl enable='yes' rendernode='/dev/dri/by-path/pci-0000:00:02.0-render'/> this wont work yet and this comment will be trimmed away by libvirt  -->
</graphics>
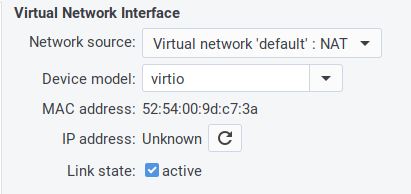
Now you can set the boot order and boot up the windows installation. If you use virtio or SCSI disk, windows wont be able to see it. You need to press load driver and then select the amd64 folder in virtscsi folder in your driver cd. Everything should work smoothly, and windows should boot in an unaccelerated slow and lame mode. Cortana will also scream at you by default, and your networking will not work either. Suffer through this and get to your desktop. Once you are there, right click on the start menu button and click device manager. Go through every category and look for any devices with a ⚠ or "Microsoft Standard Graphics Device". Right click, and select update drivers. Make it search through the dvd you attached and it will find the correct one and give you a slightly accelerated windows. Do this for the network device and any others.
The Fun Part I Think (Step 4)
To preface are three ways to get the virtual accelerated screen of your windows machine on your own screen.
- VNC or some other remote protocol (pretty usually bad)
To get this you need to just attach the vgpu and delete every other display and graphics card. Also set display='off'.
You dont need the igd-opregion shown later - SPICE (couldnt ever get it to reach 30fps or higher, but it has copy and pasting and file sharing and works)
- QEMUs built in GTK interface (no copy pasting, but can reach 60fps with a patch)
No matter what you wish to use, you need to start up with the second one to install your gpu drivers. The microsoft installed gpu drivers do not work with GVT-G very well as of this blog post, and usually break things. Before attaching a VGPU to your virtual machine, I would download the latest driver installation file for the latest version of on your vm first (TODO: It looks like intel is changing up their driver distribution program, this step might be different or unneccesary in the future) . Ok, now make sure you have a VGPU from that step we did before. Open virt-manager and change the lovely speedy QXL gpu to the slow Cirrus one so it doesnt conflict. To attach it to your virtual machine, you need to pop open virsh edit and slap this somewhere:
Heads up: You might get weird segfaults and black screens if you install the driver while the vgpu is set to display='on' and igd-opregion='on'. You should turn these off until you reboot.
<domain type='kvm' xmlns:qemu='http://libvirt.org/schemas/domain/qemu/1.0'>
<hostdev mode='subsystem' type='mdev' managed='no' model='vfio-pci' display='on'>
  <source>
    <address uuid='fff6f017-3417-4ad3-b05e-17ae3e1a4615'/>
  </source>
  <address type='pci' domain='0x0000' bus='0x00' slot='0x09' function='0x0'/>
  <rom enabled='no'/>
</hostdev>
<graphics type='spice'>
  <listen type='none'/>
  <image compression='off'/>
  <jpeg compression='never'/>
  <zlib compression='never'/>
  <playback compression='off'/>
  <streaming mode='off'/>
  <gl enable='yes' rendernode='/dev/dri/by-path/pci-0000:00:02.0-render'/> <!-- your render path might be different, virt manager can set this for you with the GL checkbox. make sure its set to a path and not auto -->
</graphics>
<qemu:commandline>
  <qemu:arg value='-set'/>
  <qemu:arg value='device.hostdev0.x-igd-opregion=on'/>
  <!-- not currently supported by libvirt so you have to set it yourself -->
</qemu:commandline>
</domain>
Note: when I provide an XML piece like this, you should merge it with your current one, not replace things if you can.
Make sure to set the UUID to whatever you used, and to make the slot number something thats not used by any other PCI devices. If the slot number is after (TODO: it might be before) the Cirrus GPU it will crash. Now you can start the virtual machine. You need to install virt-viewer to see both displays! sudo -E virt-viewer --attach should let you see them. One will be blank or uninitialized, and the other will be familiar, small, and unaccelerated. Open that one up and log in, and install your gpu driver. If you are lucky and really cool, it might just work right away. If you arent, you should shutdown and then startup the vm (different then rebooting) with the working screen. Nows a good time to open a terminal and run sudo dmesg -w in it. This will give you some information on problems and progress when the vgpu is being used. For example, on boot, KVM will complain about blocked MSRs, and then you should get a few invalid accesses as the vgpu is initialized. If you get an unreasonable amount of them, something is wrong.
If it boots, you can open display settings and disable the unaccelerated screen. You can hide the blank screen with the view menu of virt-viewer. You could totally use your vm like this, but there are some other things you can do to get some more speed and resolution.
The Custom Resolution Utility is pretty useful. You can play around with it, and if you ever get a graphical glitch or mostly black screen like I tend to do you can run Restart64.exe included with it to restart the graphics system of windows. I personally use it to use a higher resolution on a smaller vgpu. (TODO: Screenshots and CRU tutorial)
To get that beautiful 60 FPS, you will need to switch to the built in GTK viewer of qemu with no fancy copy paste and stuff like that, and modify one line of and build qemu yourself. And also tack on a bunch of ugly command line arguments to your libvirt xml. Remove the spice display and the cirrus graphics card, and change the display attribute of your vgpu to off (libvirt doesnt support the GTK display and wont let you boot with display='on' without a display).
  <qemu:commandline>
    <qemu:arg value='-set'/>
    <qemu:arg value='device.hostdev0.x-igd-opregion=on'/>
    <qemu:arg value='-set'/>
    <qemu:arg value='device.hostdev0.display=on'/>
    <qemu:arg value='-display'/>
    <qemu:arg value='gtk,gl=on'/>
    <qemu:env name='DISPLAY' value=':1'/>
    <qemu:env name='GDK_SCALE' value='1.0'/>
  </qemu:commandline>
The HIDPI scaling of qemus gtk viewer sucks pretty bad, so we turn it off. As well, you need to set your display variable to the one you are using, which you can get with echo $DISPLAY in your terminal. In order to give the user qemu runs as access to your x server, you need to run xhost si:localuser:nobody. If that doesnt work you should try xhost + , but make sure you are using a firewall or try another safer method.
This will be limited to 30fps by a dumb bug in qemu unless you patch it by changing the line linked in the comment. Make sure to only built the x64 platform of qemu unless you plan to use another architecture. Ive attached my pkgbuild that doesnt change the line for you but only builds the x86_64 and no fancy network storage here. (TODO: AUR?)
If you got lost along the way, you can check out my current libvirt xml.
References
https://github.com/intel/gvt-linux/wiki/GVTg_Setup_Guide
https://github.com/intel/gvt-linux/wiki/Dma_Buf_User_Guide
https://nixos.wiki/wiki/IGVT-g#Configure_KVM
Check out the issues page of that gvt-linux repo, there are constantly new issues and patches for issues I work around here, and the gvt team is very good at responding and confirming whats broken and what isnt.